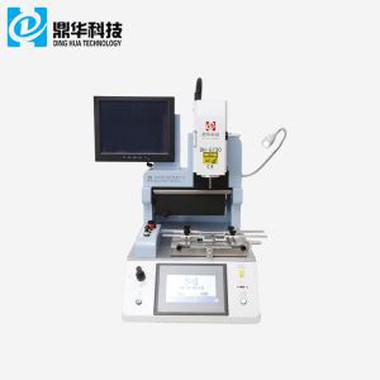
2 in 1 Head Touch Screen SMD Rework Station
DH-200 BGA Rework station is one of the machines that you can merely get familiar with. It has user friendly software. where the user can create standard profiles or free mode profiles then download it to DH-200 BGA Rework station memory or save it on PC. It can complete chip-level repairing for mobile phone very soon.
Description
2 in 1 Head Touch Screen SMD Rework Station
1. Product Features of 2 in 1 Head Touch Screen SMD Rework Station

1. The first-, second-zone with over temperature protection design.
2. After finishing desoldering & soldering, there is an alarming. The machine is equipped with a vacuum suction
pen to facilitate the removing of BGA after desoldering.
3. Desoldering and soldering of small and medium size surface mount device (SMD): BGA, QFP, PLCC, MLF and
SOIC. The component is manually remoced from the PCB (pincette or vacuum gripper). Previous to soldering the
component needs adequate alignment.
4. The second temperature can adjust according to different PCB board appearance and components, prevent
collision with PCB lower plate components;
2.Specification of 2 in 1 Head Touch Screen SMD Rework Station

3.Details of 2 in 1 Head Touch Screen SMD Rework Station
1.2 independent heaters ( hot air & infrared );
2.HD digital display ;
3.HD touch screen interface , PLC control ;
4.Led headlamp ;


4. Why Choose Our 2 in 1 Head Touch Screen SMD Rework Station?


5.Certificate of 2 in 1 Head Touch Screen SMD Rework Station

6.Packing & Shipment of 2 in 1 Head Touch Screen SMD Rework Station


7.Related knowledge of 2 in 1 Head Touch Screen SMD Rework Station
What are processes of resolder?
1, smearing solder paste: bga ball. To ensure the soldering quality, check the PCB pad for dust before applying
the solder paste. It is best to wipe the pad before applying the solder paste. Put the PCB on the service desk and
use the brush to apply an excessive amount of solder paste to the pad positions and bga to mount the ball. (Too
much coating
will lead to a short circuit. Conversely, it will be easy to air-weld. Therefore, the solder paste coating must be
uniformly over-proportioned to remove dust and impurities on the BGA solder ball. For bga ball-forming, str-
engthen the welding results).
2. Mounting: The BGA is mounted on the PCB; the silk screen frame is used as a positioner to align the BGA pad
with the pad of the PCB board. Note that the direction mark on the BGA profile should be connected to the PCB
board Correspond to the direction signs to avoid BGA reverse direction. Graphic and text. At the same time when
the solder ball is melted and welded, the tension between the solder joints will have an inevitable self-alignment result.
3, welding: The order with the order of demolition. Placing the PCB board on the BGA rework station ensures that
there is no fault in the connection between the BGA and the PCB. I don't know bga to plant the ball. Apply the des-
oldering temperature curve and click on the weld. Process. When the heating is finished, it can be removed after
active cooling, and the repair is completed.